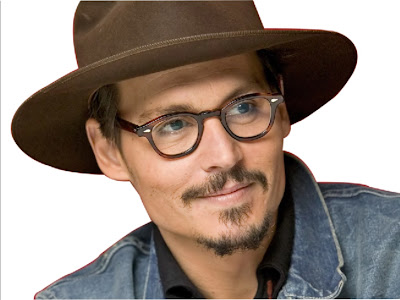
INSTAGRAM EFFECT IN PHOTOSHOP
In this tutorial we’ll learn how to create a quick instagram effect in Photoshop.
Open your image and go to Layer>New Adjustment Layer>Levels.From the RGB panel select Blue(Alt+5) and set the value of the Output Levels to 60.
Now go to Layer>New Fill Layer>Solid Color and use the value #f6ddad for this creamy color an then set the blending to Multiply.
After this go to Layer>New Adjustment Layer>Curves.You can see in the images the values i used for the final image.Have fun.
PUZZLE EFFECT AND TRICKS
First for our model JD.. :D
after you import your image duplicate first then image go to Filter > Texture > Texturizer. First time you do this you’ll not find the puzzle texture here. You don’t have to search for it on the Web because it’s already in your computer. Just click on the little arrow you see in the image below in order to load the texture.
Go to My Computer > Program Files > Adobe > Adobe Photoshop CS3 (or your version of Photoshop) > Presets > Texture and choose Puzzle. After you’ve loaded the texture adjust it as you like and hit OK.and here is your puzzle!You can stop here or you can play a little more for a nice effect.to make some effect use the pen tool.. same as my tutorial in changing the backround using pen tool.. :DTake the Pen Tool, zoom into the image, make sure you have Path option selected and start selecting one piece of puzzle. Make a white layer below the textured image and fill it with white. Cut and paste the selection into a new layer, above all the others. Apply some layer style and you are done!And that’s how you turn your photos into a puzzle! Hope you had fun!
Blur your background by using motion blur
Jhonny Depp for my model..
Duplicate the background layer
Filter - Blur - Motion blur
Set angle 40 , Distance 40
Add Vector Mask
Brush tool nad Capacity change to 100%
Final
READMORE
Retouching and remove the pimple in easy way
For the model.. thank you ! :D even we're stranger.. hehe..
Duplicate the layer or Ctrl + J
Filter - Blur - Gaussian blur
I set gaussian blur to "2" for this image
Filter - noise - Dust and scratches
Dust and scratches.. I change radius to "2"
Add Layer mask
Image - Adjust - Invert or Ctrl + I
Use brush and change the capacity to 40%
Final
READMORE
Cartoonize your photo
Johnny Depp our model.. :D
duplicate the picture/image by selecting: Layer -> Duplicate
Rename the Duplicate Layer what you like..
After you duplicate the picture/image, make sure you select the 'Duplicate Layer' . Follow this procedure: drop-down list, select the 'Color Dodge'
After applying 'color dodge'
Image -> Adjustments -> Invert. Meron ding short-cut, 'Ctrl-I'
after you invert..
Blur: Filter -> Blur -> Gaussian Blur
Blur, example i use '2' for my blur..
Threshold: Layer -> New Adjustment Layer -> Threshold
set the desired amount.ang value. iI set to 245 threshold Hint: Gaussian Blur and Threshold Level to your desired 'clarity'.
24
erase the dirty dots.
after you erased.
Layer': Layer -> New -> Layer
use brush tool to color yuor image..
after you color your image..
Mag the following Filters
Filter -> Blur -> Blur More. Gawin ito base sa inyong gustong kalabasan ng image
Filter -> Sharpen -> Smart Sharpen. Gawin ito base sa inyong gustong kalabasan ng image
Layer -> New Adjustment Layer -> Photo Filter
Final Johnny Depp..
READMORE
Removing the Background using Pen Tool
Because of the curved shape of Johny Depp body in this image, the ideal selection tool is Photoshop's pen tool. The background makes it very difficult to use the other selection tools, but it's a fairly simple shape for drawing a path. The entire selection process for this image took approximately fifteen minutes using the technique below.
The pen tool allows you to draw a path around your image consisting of bezier curves. If you're not familiar with pen tool or working with bezier curves.
Pen Path then set the foreground color to white..
Personally, I find it easier to place the points of my path around the image initially, and then go back and edit the curves later. If you're comfortable drawing with the pen tool, you may prefer to draw the curves as your create your path, or you may prefer the magnetic pen tool.
Make Selection and chage to 1 or any number you like..
Ctrl + J
Create a new layer for your background
I use paint bucket tool for my background
Your background should be below of your image like this..
FINAL
READMORE
Subscribe to:
Comments (Atom)


